Have you ever marveled at the transformation of a cozy throw blanket into a chic DIY Belted Blanket Poncho, a testament to how simplicity converges with style? This project epitomizes the blend of comfort and fashion inherent in DIY clothes, specifically ponchos, transforming a basic piece of fabric or wool into something extraordinary. What’s more appealing is the project’s quick completion time, making it a beacon for those seeking fast and easy DIY poncho ideas.
Why Choose a DIY Belted Blanket Poncho?
Creating a DIY Belted Blanket Poncho is not just about crafting something unique; it’s about embracing cost-effectiveness, customization, and the profound joy of donning a piece you’ve made yourself. This project uses simple materials, like a piece of fabric or wool, and transforms them through minimal tools—a pair of scissors and a belt—without the need for a sewing machine. It’s a great idea for DIY enthusiasts at all levels, especially beginners.
Real-Life Charm
Imagine wrapping yourself in a blanket poncho that not only keeps you warm but also elevates your style quotient. Picture how it pairs seamlessly with shirts, dresses, jeans, or as a chic addition to casual wear accessories. I’ve witnessed firsthand, and through shared testimonials, the versatility and style that a blanket poncho can offer. It’s the perfect blend of fashion and functionality.
Simplicity meets satisfaction.
The beauty of crafting a DIY Belted Blanket Poncho lies in its simplicity. With just a few edges to snip and a belt to tie, you can fashion a poncho that rivals any store-bought alternative. This simplicity is what makes it such a great idea for those dipping their toes into DIY projects. No intricate patterns, sewing, or knitting are required; just a straightforward cutting and styling process results in a super cozy poncho.
In my journey, starting with a soft wool throw, I cut a neck hole at the center, carefully measuring to ensure a snug yet comfortable fit around my head. I then chose a belt—a leather one with intricate detailing—to cinch the poncho at the waist, creating a flattering silhouette that works just as well with jeans and sneakers as it does with a dress and boots.
Crafting a DIY Belted Blanket Poncho is a journey into the heart of creativity and style, melding the coziness of your favorite blanket with the chic, versatile wearability of a poncho. This guide is designed to demystify the process, providing you with detailed instructions, material suggestions, and styling tips to ensure your DIY venture is as enjoyable as it is successful.
What You’ll Need
List of Materials
To embark on this creative endeavor, you’ll require a few basic yet essential items:
- Fabric Choice: Opt for warm materials like fleece, wool, or a throw blanket. These fabrics offer the perfect blend of comfort and aesthetic appeal.
- Belt: A belt not only secures the poncho but also adds a stylish accent. Consider leather for a classic look or a woven fabric belt for a bohemian vibe.
- Measuring Tape and Scissors: Precision is key, making these tools indispensable for ensuring your poncho has the perfect fit and finish.
Where to Find Materials
- Fabric Selection: Visit local craft stores or thrift shops for unique finds like knit fabric, wool, or even a decorative throw blanket. Online marketplaces are also treasure troves for materials, offering a wide range of colors and patterns to match any style.
- Accessorizing: Belts can be found in a variety of places, from your local fashion stores to online platforms. Look for something that reflects your personal style and complements the fabric of your poncho.
Setting up a clean, flat surface is crucial for this project. A large table or even a cleared floor space can serve as an ideal workstation. Ensure you have good lighting and all your materials within reach for a seamless DIY experience.
More Post
Minimalist Magic: How to Make a Sweater From Scratch
Minimalist Magic: Easy DIY Jewelry Holder Ideas—Craft Your Own Organizer Today!
Step-by-Step Guide to Creating Your Poncho
Cutting the blanket
- Fold the Blanket: Lay your chosen fabric flat and fold it in half to find the center. This fold will help you identify where to cut, ensuring symmetry.
- Cutting the Neck Hole: Measure a straight line or circle (depending on your preferred neckhole shape) at the fold’s center. Cut carefully, making sure not to extend the hole too wide. A good rule of thumb is to start small—you can always make the hole larger if needed.
Visual Aids: Incorporating photos or simple illustrations here can significantly help visualize the cutting process, especially for creating the head hole or neck hole without the need for a comprehensive watch tutorial.
Adding the Belt
- Choosing the Right Belt: The belt you choose can dramatically alter the poncho’s look. For a sleek, urban style, a slim leather belt works wonders, while a thick, ornate belt can give a more bohemian or rustic appearance.
- Securing the Belt: Place the belt around your waist over the poncho, adjusting until you find the most flattering silhouette. The belt should sit comfortably, accentuating your waist and giving form to the otherwise flowing fabric.
Creating a DIY Belted Blanket Poncho is not just an act of fashion; it’s a statement of individuality and creativity. As we delve into the world of styling and customization, remember that each piece you create is a reflection of your unique style and personality. Let’s explore how to elevate your DIY poncho from a simple project to a staple piece in your wardrobe.
Styling tips and tricks
The versatility of the DIY Belted Blanket Poncho makes it perfect for a range of occasions. Pair it with jeans and a t-shirt for a casual yet chic look, ideal for a coffee run or a day out with friends. For a more sophisticated ensemble, drape your poncho over a dress, using the belt to cinch at the waist, perfect for evening events or dinner dates. The key is in the fabric and pattern choice; a wool poncho in a neutral color offers immense versatility, while a fleece poncho with a vibrant pattern can be a statement piece for casual outings.
Accessorizing
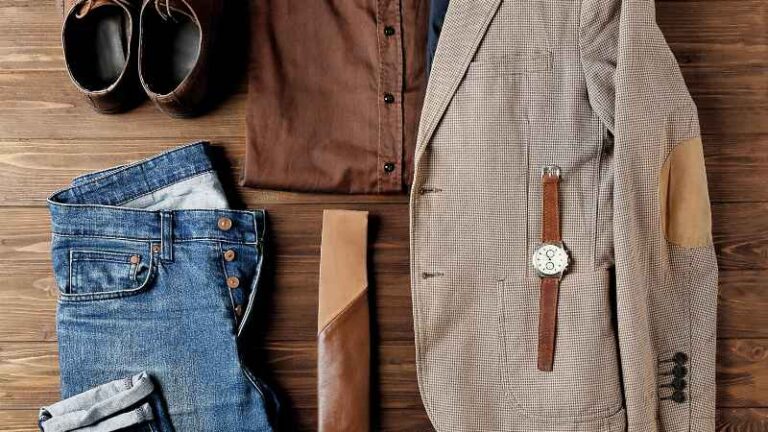
Accessories can transform your DIY poncho into a fashion-forward ensemble. Shoes, sweaters, and other accessories play a pivotal role in completing the look. For a fall aesthetic, pair your poncho with ankle boots and a sweater underneath for added warmth. During spring, sneakers and a light scarf can complement the poncho for a lighter, airy feel. Sweater mittens or a matching DIY scarf can also add a cozy touch to the outfit, making it uniquely yours.
Conclusion
Embrace your creativity and experiment with different fabrics and patterns to create a DIY Belted Blanket Poncho that speaks to your style. The beauty of DIY is in the endless possibilities and the joy of creating something uniquely yours.
For those interested in adding more complex features to their ponchos, like pockets or a hood, basic sewing tutorials can be found online, providing step-by-step instructions to enhance your skills. Additionally, consider exploring further reading on matching DIY accessories, such as sweater mittens or a scarf, to complement your poncho for a cohesive, handmade wardrobe.
More Post
15 Easy Fall Fashion Tutorials: Unlock Your Style This Season